Editing marked audio in Audacity
This tutorial will show you how to turn claps or other intentional loud sounds you may have used to mark blooper locations in your audio into audacity labels, for easier navigation between such spots.
The first two sections of this tutorial will go through everything step-by-step, so it may seem like there’s a lot of steps. However, (a) even getting through just the first section may be super helpful for you! And (b) the Quality of life improvements section will describe how to set up some macros to streamline things for next time.
This tutorial applies slightly differently to Audacity 2.4.2 vs 3.x (Sound Finder and Silence Finder got merged into Label Sounds at or near Audacity 3.0), but there will be screenshots for both.
Adding point labels
-
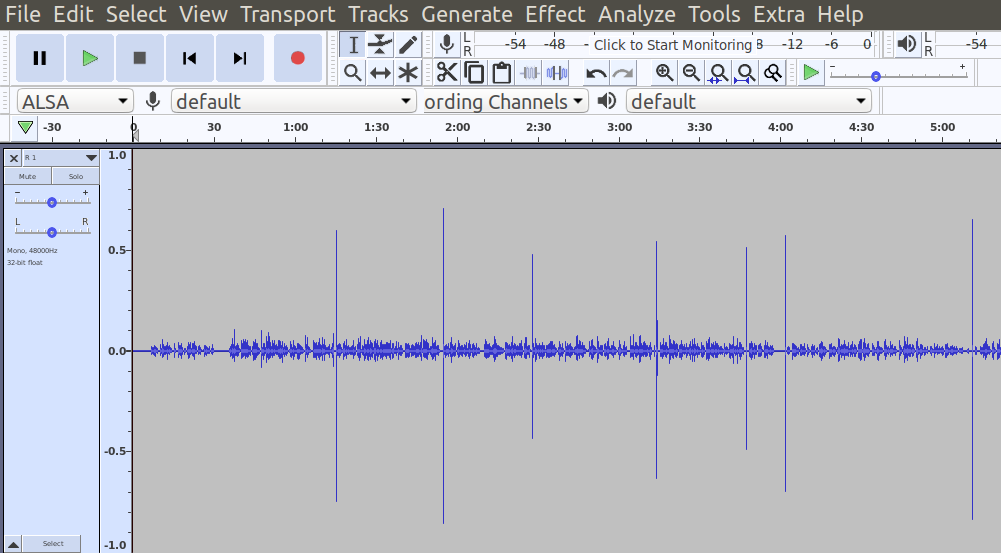
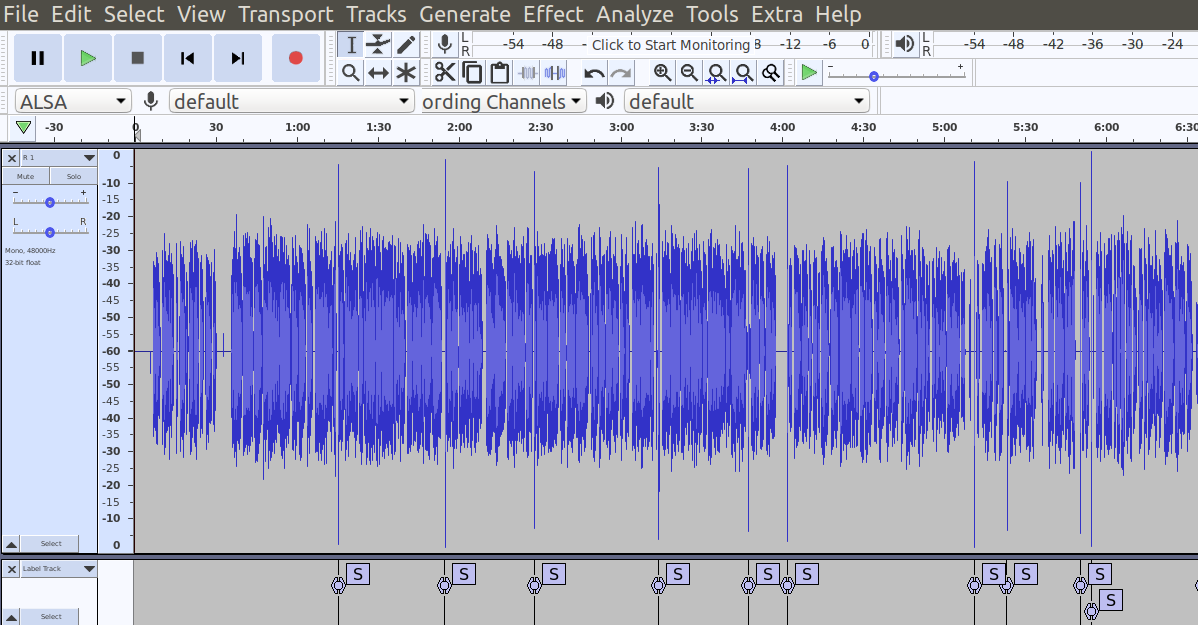
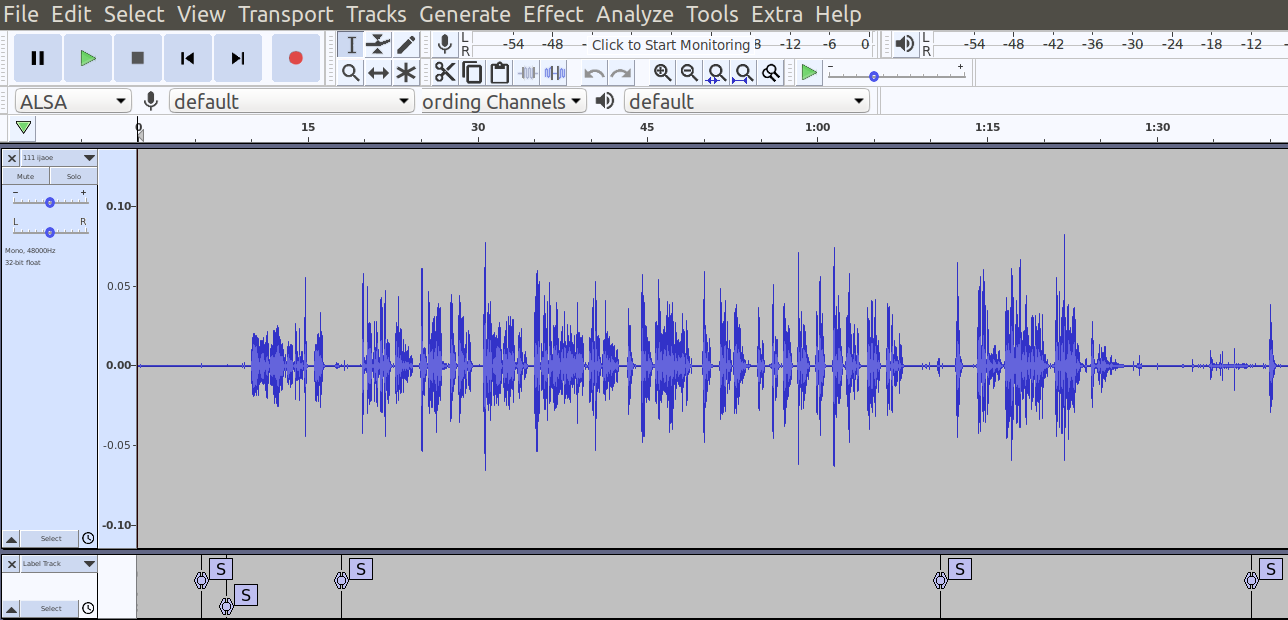
While recording, clap/snap/click your tongue/use a dog clicker/etc when you blooper/need to take a too-long breath/etc. For me, this results in audio that looks kinda like this:
-
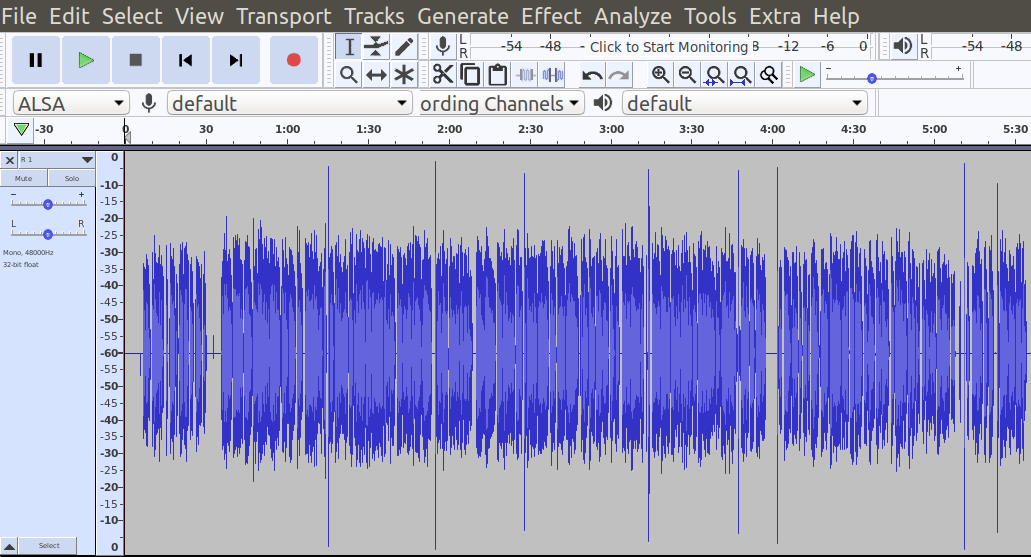
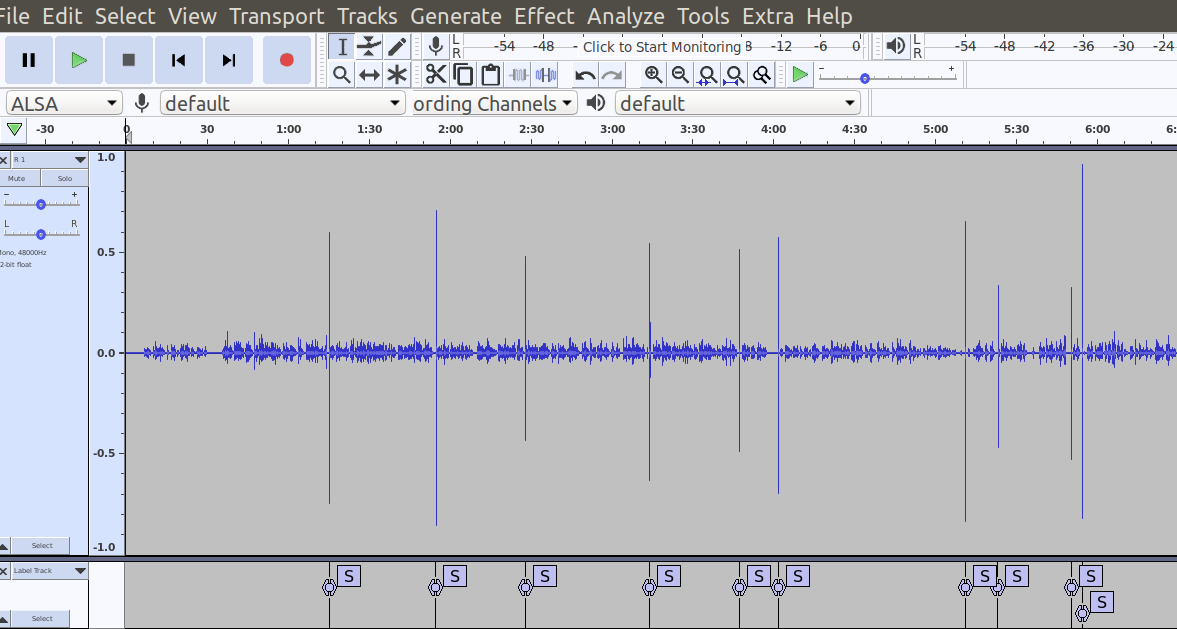
Switch to dB view so you can eyeball a threshold for the spikes—with my setup, I tend to pick -18 dB as the dividing line.
-
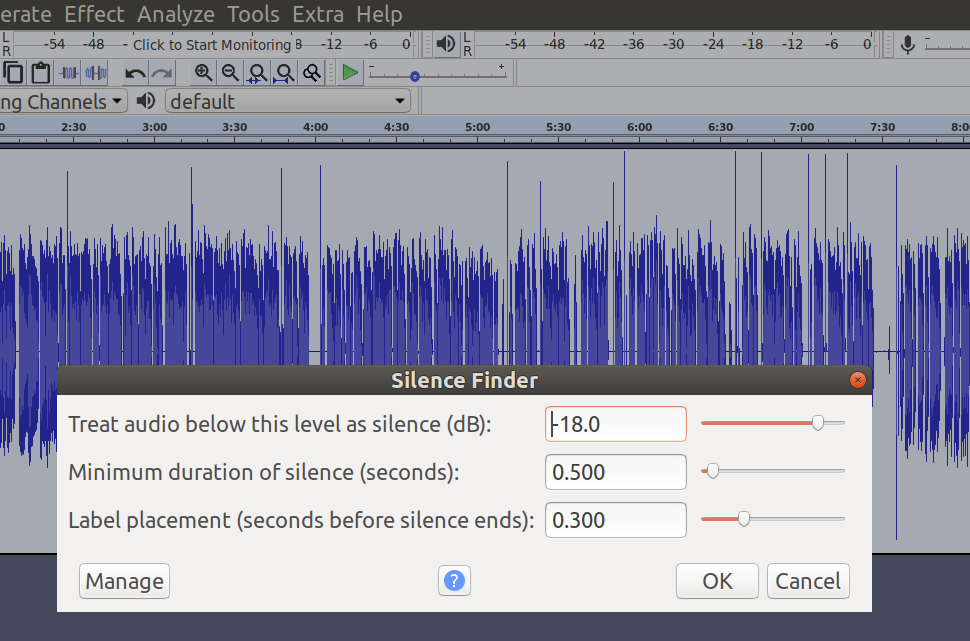
Select all your audio, then go to the “Analyze” menu and pick “Silence Finder…” (Audacity 2.x) or “Label Sounds…” (Audacity 3.x).
- With Silence Finder, you can see I’ve set the silence threshold at -18 dB, set the minimum duration as 0.5 sec (this value doesn’t really matter; it’s the minimum distance between spikes/claps), and the labels to be placed .3 seconds before each spike.
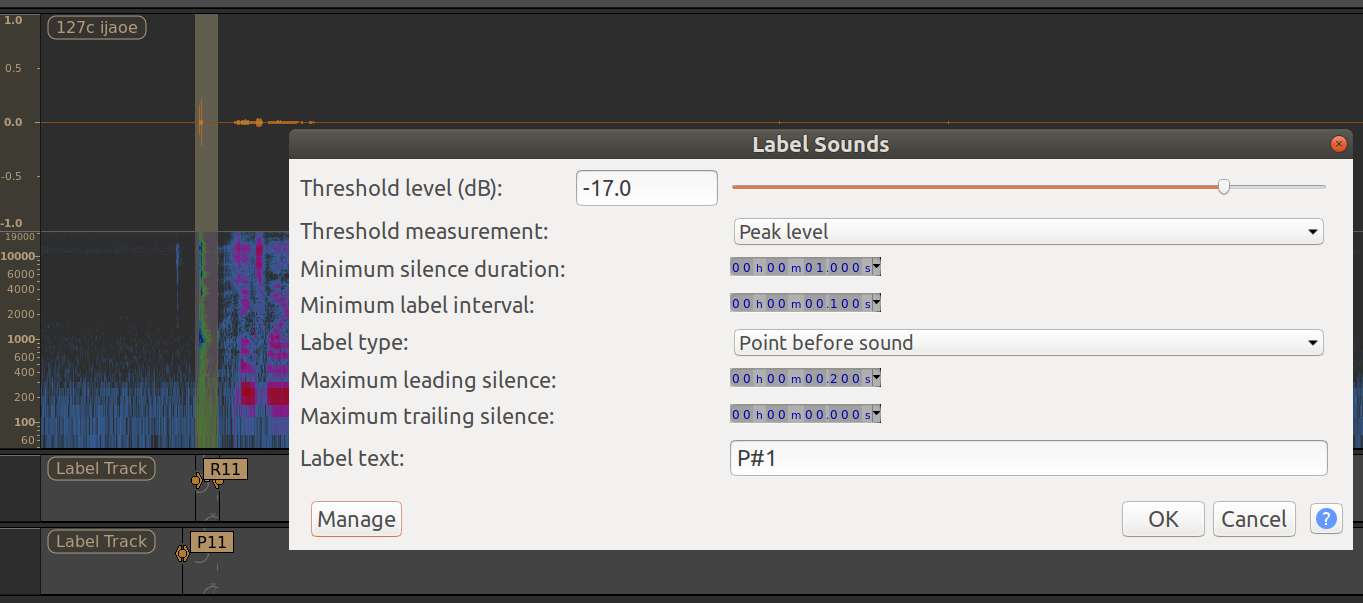
- With Label Sounds, I happened to set it to -17 instead. Be sure to set the label type to “Point before sound.” These settings create labels with the format “P#” instead of “S”:
- With Silence Finder, you can see I’ve set the silence threshold at -18 dB, set the minimum duration as 0.5 sec (this value doesn’t really matter; it’s the minimum distance between spikes/claps), and the labels to be placed .3 seconds before each spike.
-
Yay, you now have labels! If you’re clicked anywhere on the audio or label track, you can now alt + → and alt + ← (on mac, opt + ← or opt + →) to jump between adjacent labels. This also works during playback.
-
Switch back to linear view, because it’s easier to tell whether the labels are placed correctly in that view (there might be times where your own voice was a little louder and got mis-classified as a clap). Looks like this section was correctly classified though:
I usually do a first pass to remove the claps so I don’t accidentally deafen myself later. If you don’t need that, declare victory! Otherwise, carry on:
Adding region labels
- Add another label track, and move it so the empty label track is directly below the audio (you can also use this plug-in I wrote to directly add a label track below the current track, if you’re annoyed by having to move it after creating it):

- Use “Sound Finder…” (Audacity 2.x) or “Label Sounds…” (Audacity 3.x) to find and label the claps. The “Label starting point” in Sound Finder corresponds to “Maximum leading silence” in Label Sounds, and the “Label ending point” in Sound Finder corresponds to “Maximum trailing silence” in Label Sounds
- In Sound Finder, the “18” corresponds to the “-18” in the silence finder menu, so if you picked a different value, use it again here. Minimum duration of silence between sounds is also the same as before. The next step has a diagram explaining how to pick start/end values.
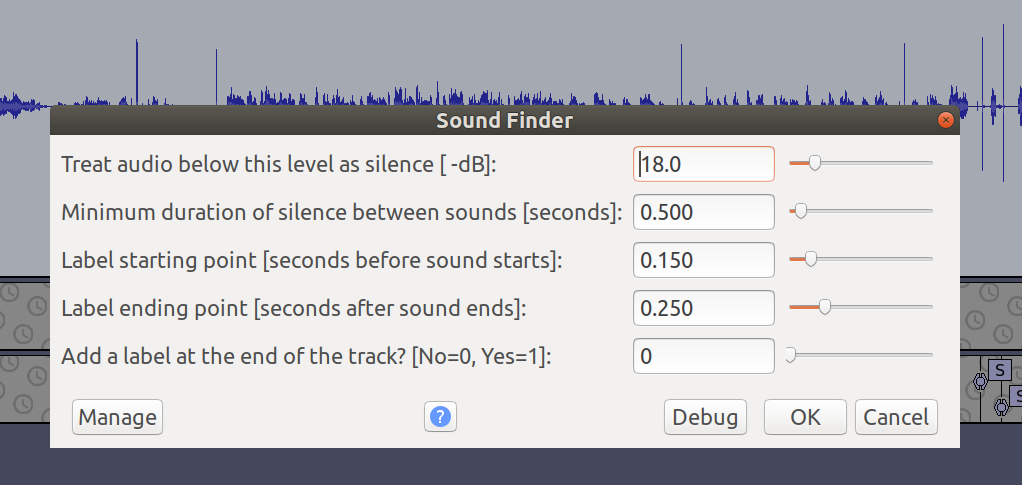
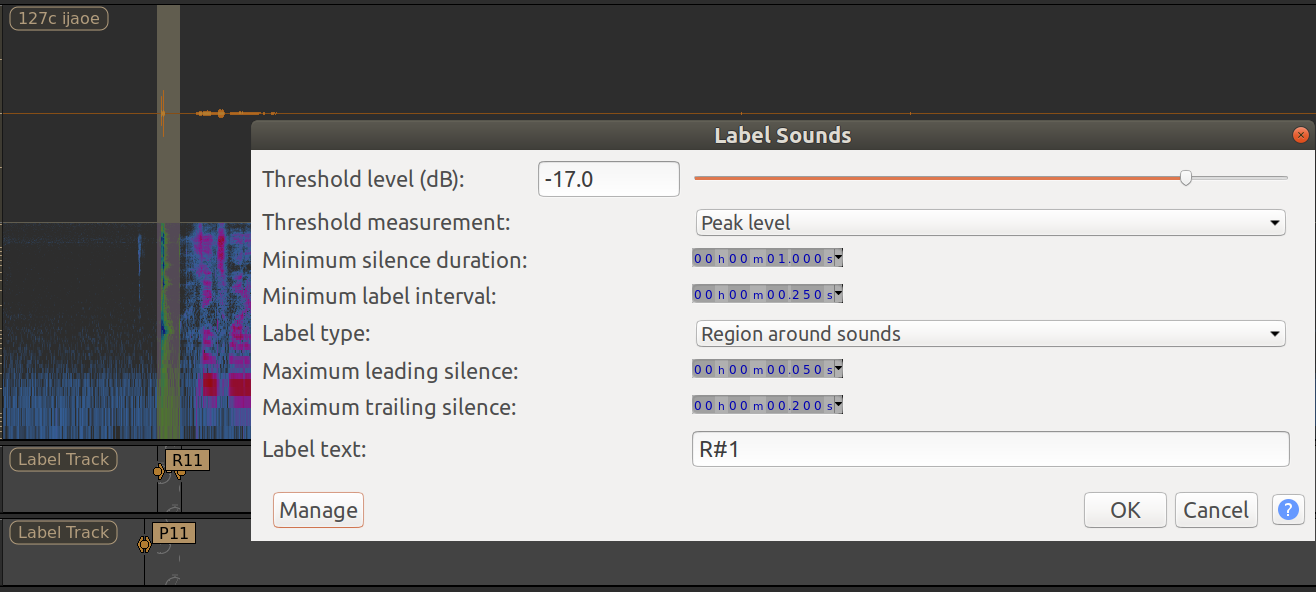
- In Label Sounds, the following settings create labels that wrap around the snap/spike, and names them something like “R#” instead of just “#”. Be sure to set the label type to “Region around sounds”
- In Sound Finder, the “18” corresponds to the “-18” in the silence finder menu, so if you picked a different value, use it again here. Minimum duration of silence between sounds is also the same as before. The next step has a diagram explaining how to pick start/end values.
-
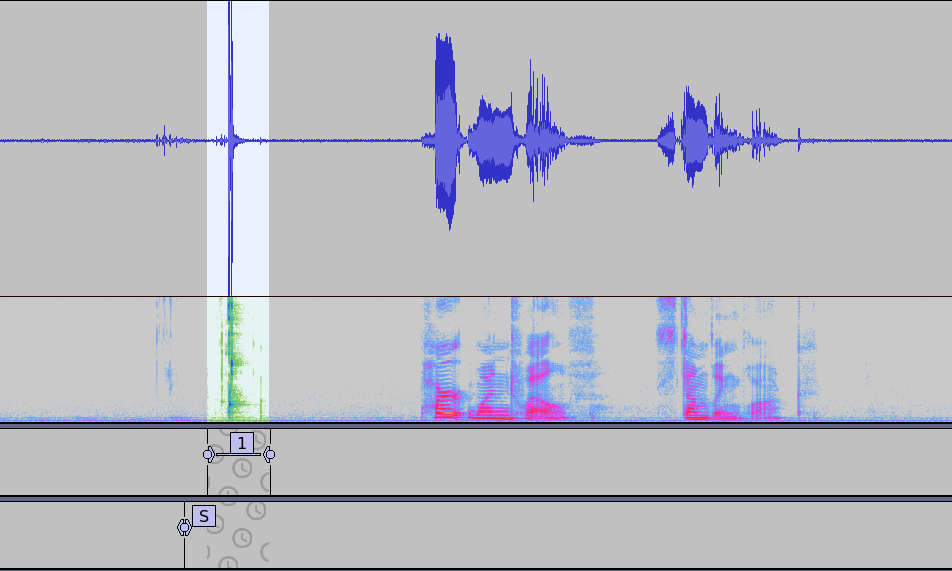
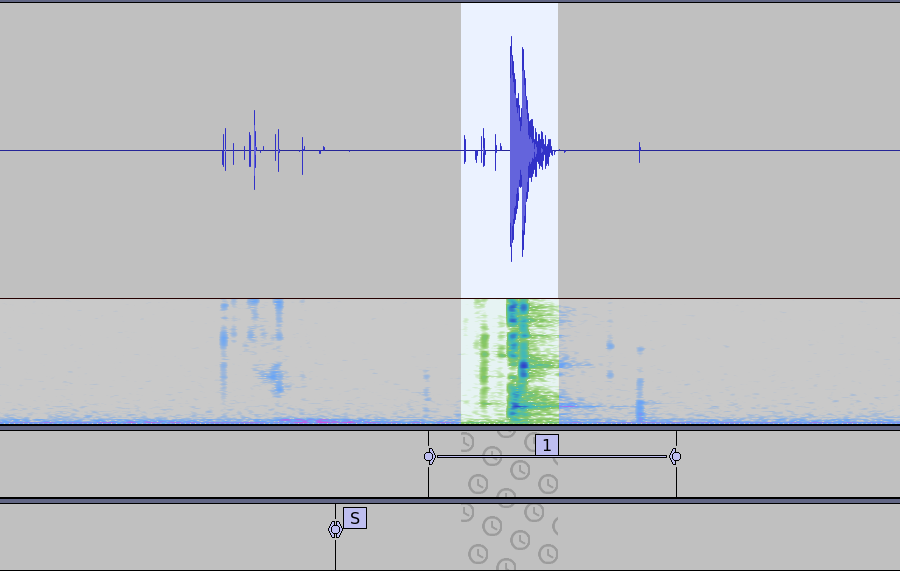
To explain further about start/end points (aka leading/trailing silences)–you want the start to be after the point label, so you don’t delete that label when you delete the sound, so I picked 0.15 since it’s half of 0.3 (in the Label Sounds screenshot I apparently picked 0.05 seconds instead). You want the end segment to include the whole sound. 0.25 seconds works for me, but you should probably double-check against your own audio. Note that it’s much easier to see the end of the sound in linear view and/or spectrogram view (first image) than in decibel view (second image has both decibel and spectrogram, so you can see the difference even though the zoom is different), so make sure you’re not accidentally choosing a value that’s too short:
-
Make sure “Tracks” → “Sync-Lock Tracks (on/off)” is on before you continue (that’s what’s causing the little clock icons to show up on the label tracks, and means that when you delete from any of the tracks, you’ll also delete the same amount from the other tracks, so your labels stay in sync with the bloopers that are later in the audio)
In 3.x versions of audacity, I have experienced interactions between sync-lock and the preference setting “Editing a clip can move other clips” which did not behave how I expected. While sync-lock is on, I recommend also turning this setting on! It can be found under “Edit” > “Preferences” > “Tracks” > “Tracks Behaviors”
-
Click on the first label track (the one with the region labels) and navigate to the first label (alt or opt + left/right arrows). This will also select the corresponding audio.
- Press z to align the waveform on either end of the audio selection
- (optional) press space to play back the click and make sure it’s actually a click and not a particularly loud word
- Press delete to remove the audio. (This will sometimes delete the region label, and sometimes not–we’re going to delete that whole label track in a sec so this doesn’t matter)
- Navigate to the next region label
- Once you reach the end of the track, remove the label track with the region labels by clicking the little “x” at the upper left of that track. And there you have it! Labeled audio, without any pesky loud bits to deafen you, and with only convenient point labels to jump between:
Quality of life improvements
I have not tried things in this section before Audacity 3.0.2, but you may be able to make something similar work.
User presets (particularly helpful for Audacity 3.x)
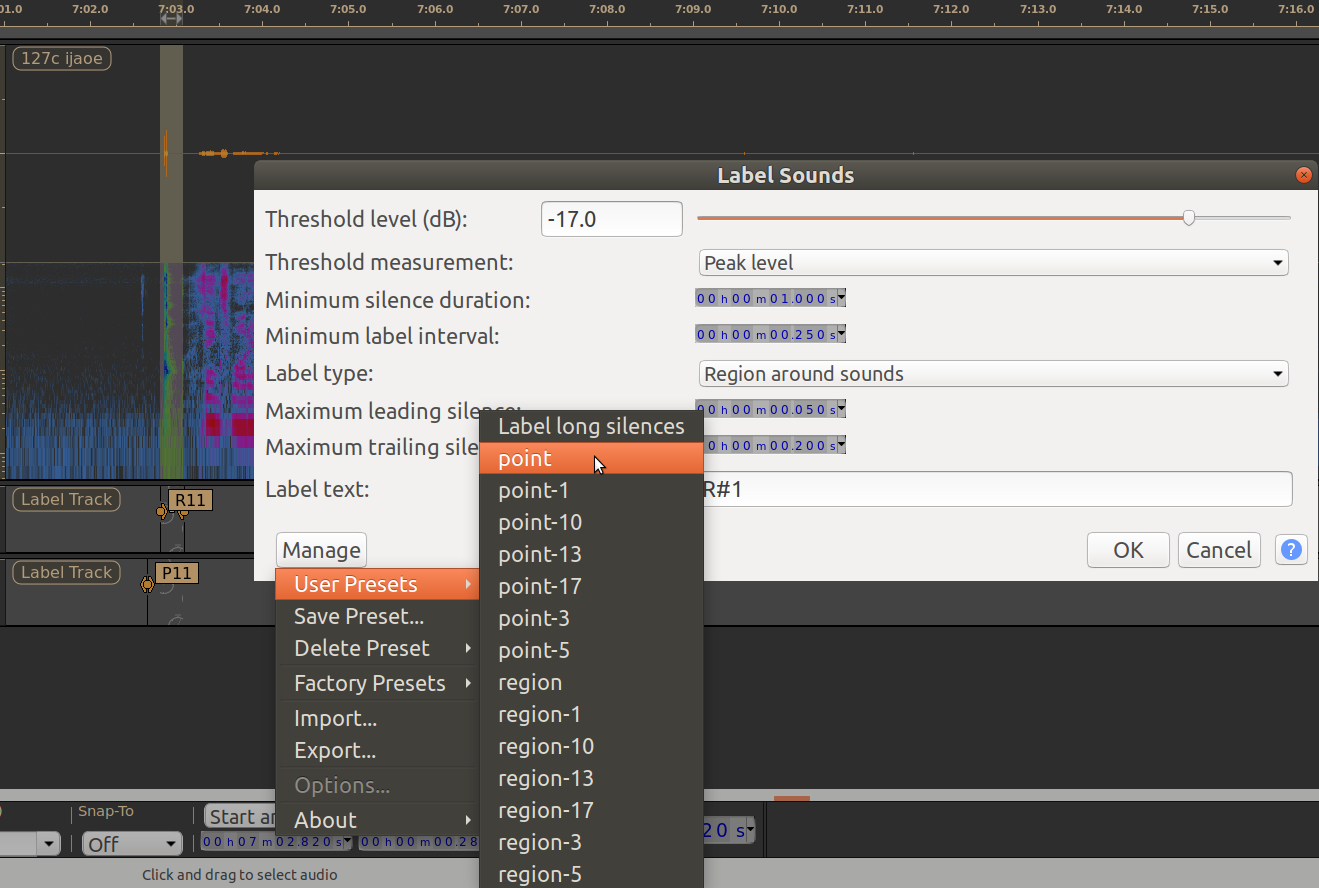
To make swapping between Label Sounds for points and Label Sounds for regions easier, save your settings for each as a user preset! You can do this by clicking “Manage” in the bottom left of the pop-up, and then “Save Preset…,” after which it will show up under “User Presets >” and you can get back those exact settings any time by clicking the preset you want (I have…many presets, but that’s a tutorial for a different day):
Label sounds and silences in one step
A while back I got annoyed about the step where you need to add a new label track directly below the audio track, and wrote an audacity plug-in to do it for me. It’s linked at the following forum post (Why Are New Tracks Always Added to the End?…) and can be installed via the nyquist plug-in installer.
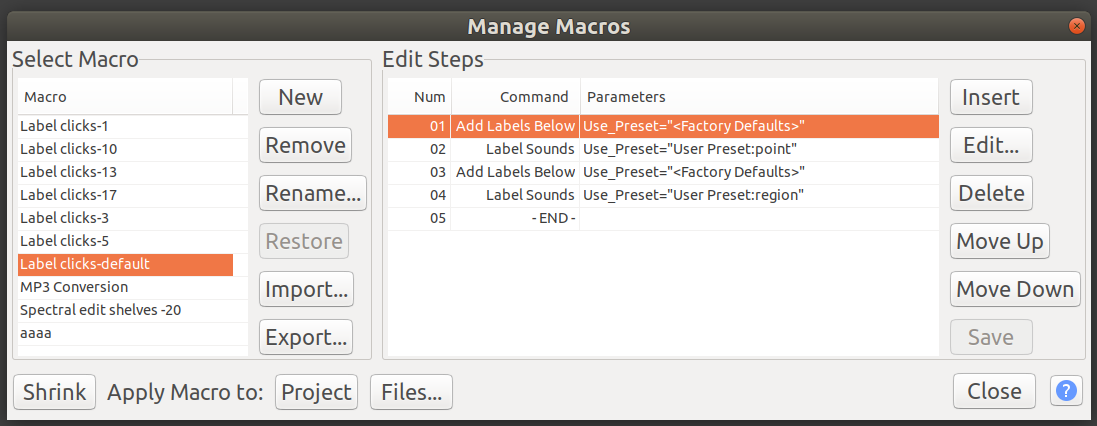
As a result, I now have a macro that can add both point and region labels in one step (if you copy the following lines into a file “Label clicks.txt” you can import it directly by clicking “Import…” from “Tools” > “Macros…”). This relies on the existence of user presets “point” and “region” for “Label Sounds,” so make sure to set those up how you want them before trying to run the macro, and/or replace those with your own preset names.
AddLabelsBelow:Use_Preset="<Factory Defaults>"
LabelSounds:Use_Preset="User Preset:point"
AddLabelsBelow:Use_Preset="<Factory Defaults>"
LabelSounds:Use_Preset="User Preset:region"
Or:
Delete and jump to next as a single macro shortcut
You can adapted Audacity: applying an effect to multiple labeled regions to make a macro that does “(a) select zero crossings / (b) delete / (c) jump to the next label” as a single step. I have this saved to the keyboard shortcut alt + ↓, so that in the blooper pass I just have to sit there going either alt + → (jump to next click) or alt + ↓ (delete current selection and jump to next click) until I get to the end of the track.
Why so many macros/presets? / Here there be dragons
You may notice I have a bunch of very similarly-named “label clicks” macros—each “Label clicks-N” macro uses the user preset “point-N” and “region-N”, where “N” is the decibel threshold. It was kind of annoying to set up, but I wanted to know if it was possible and it turns out it is! It would probably have been smarter to just have a pre-processing step where I amplify my raw audio to the point where the threshold is in the right spot, but I only thought of that as I was writing this up.
I got impatient and found a way to reduce some of the toil of all that copying for myself, but in the process made a mistake that completely corrupted a (fortunately bogus) audacity project—I was trying to be fancy and add macros directly to audacity’s macro folder, but accidentally added two different macros that had the same name if spaces were ignored, and audacity crashed so hard the next time I opened it that it totally destroyed the audacity project I was trying to open. I also found a way to programmatically add the different user presets for the “Label Sounds” analyzer in the file audacity stores those in, but again, it was kinda nerve-wracking. I’d be happy to walk anyone who wants through what I did! (edited to add: lol past me was so optimistic that I would remember literally any of this). But I would not recommend this path to anyone risk-averse. And anyway, if your clicks are at a consistent enough volume with respect to your speaking voice and/or you pre-amplify to get your clicks at a consistent threshold, you won’t need multiple macro versions.